

The Conversation (0)
automatic
How to set up a DNS Server in home
Introduction
In today's digital age, having control over your internet infrastructure can be incredibly beneficial. Setting up a DNS server at home allows you to manage your own domain name system, providing faster internet speeds, enhanced security, and greater control over your network. This article will guide you through the process of setting up a DNS server in your home, making it accessible and straightforward even for beginners.
What is a DNS Server?
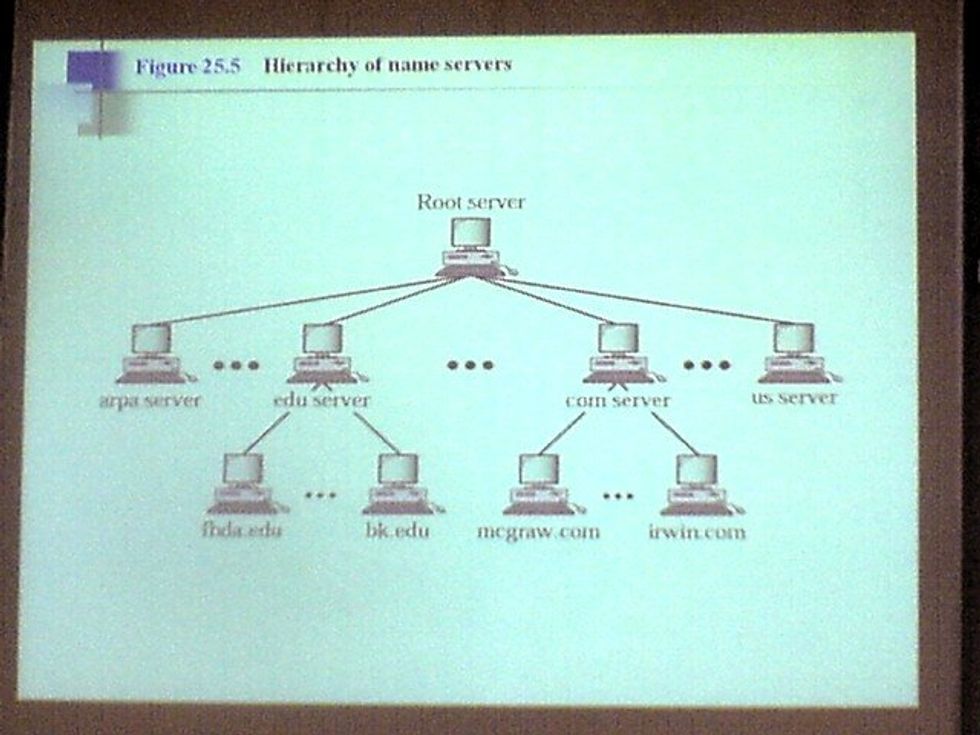
A DNS (Domain Name System) server translates human-readable domain names (like www.example.com) into IP addresses that computers use to identify each other on the network. Essentially, it acts as the phonebook of the internet, ensuring that users can access websites using easy-to-remember names instead of complex numerical addresses.
Diagram showing how DNS works
 how DNS works | Karl Baron | Flickr www.flickr.com
Why Set Up a DNS Server at Home?
Setting up a DNS server at home can offer several advantages:
- Speed: Reduce latency by caching frequently accessed domain names.
- Security: Block malicious websites and ads at the DNS level.
- Customization: Create custom domain names for your local network.
Benefits of having a home DNS server
Requirements
PROMPT Before you begin, ensure you have the following:
- A computer or Raspberry Pi to act as the DNS server.
- An internet connection.
- DNS server software (e.g., BIND, dnsmasq).
PROMPT "List of requirements for setting up a DNS server"
Step-by-Step Guide
1. Install the DNS Server Software
First, you need to install the DNS server software on your chosen device. For this guide, we'll use BIND:
<code>sudo apt-get update sudo apt-get install bind9
2. Configure the DNS Server
Next, configure the DNS server by editing the BIND configuration files. Typically, these files are located in the /etc/bind directory.
<code>sudo nano /etc/bind/named.conf.options
Add the following lines to configure your DNS server:
<code>options { directory "/var/cache/bind"; forwarders { 8.8.8.8; // Google DNS 8.8.4.4; // Google DNS }; dnssec-validation auto; listen-on-v6 { any; }; };
3. Start the DNS Server
Once configured, start the DNS server:
<code>sudo systemctl start bind9 sudo systemctl enable bind9
PLACEHOLDER Screenshot of terminal commands for setting up DNS server
Testing Your DNS Server
To ensure your DNS server is working correctly, you can use the dig command:
<code>dig @localhost example.com
If everything is set up correctly, you should see a response with the IP address of example.com.
PLACEHOLDER "Screenshot of dig command output"
Conclusion
Setting up a DNS server at home can significantly enhance your internet experience by providing faster speeds, improved security, and greater control over your network. By following the steps outlined in this guide, you can easily set up and configure your own DNS server. As technology continues to evolve, having a personal DNS server can offer even more benefits and possibilities in the future. We encourage you to explore further and customize your DNS server to suit your specific needs.